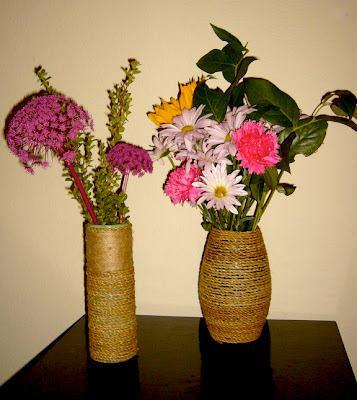
Well, now that you have some beautiful flowers (flower/pens that its..), you're gonna need a stunning vase to put them in! So why not get the designer look for a discount!!?
Natural elements and materials are a great way to give any room a warm, earthy feel and bring the outdoors in. Fall is the perfect time to experiment with different natural materials like moss, sticks and leaves... and even some twine! (like we'll do in this project!)
Right now, Crate and Barrel are selling these Rattan vases for $64.95....
Here is how to make yours for around $3.00!!! (thats a pretty hard-core discount my friends!!):
You'll need the following ingredients:
- twine or natural braided rope (available at any hardware store... but i got mine at the .99 cent store!)
- scissors
- a vase (again- got mine at the .99 cent store!!) or any item that can hold flowers...even a large plastic cup will work!
- glue gun
now assuming you have a glue gun already, you can see how inexpensive this project really is!
alright: instruction time!
First, starting at the bottom, attach the twine to the vase using a small dot of glue and begin wrapping it around.

You dont need to glue all the way around. A pea-sized amount about every inch or so should suffice.
Its really that easy! ... just wrap it all the way up!

I chose to use two different kinds of twine and used both on the skinnier vase. Get creative! you can mix ribbon or different textures to create a unique and custom look to go with any room!
And Voila~ a designer look for a discount AND something you made that you can be proud of!
Enjoy!
And here are the SAME vases featured in this months "Real Simple" magazine! See! they're super "in" and now they can be all yours!!!
(photos courtesy of Real Simple Magazine)


